Simplified Neck Angle Jig
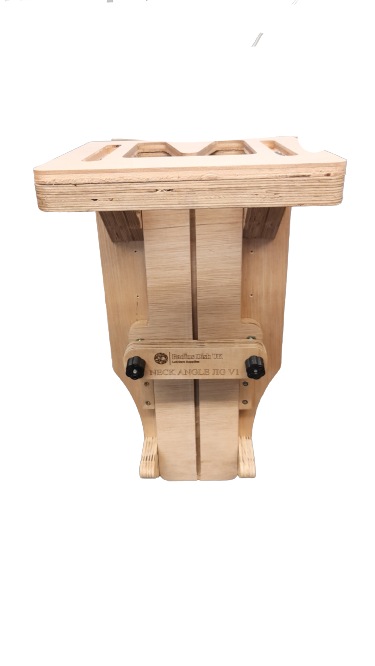
Simplified neck angle jig. This neck angle jig is budget friendly and it will do same job as any other neck angle jig.
How it's done?
Tried to show briefly in the last several photos.
The neck part of the jig, which is Z shaped thingy, gets clamped before using it. The pivoting cradle has 2 locking nuts on the sides which follow the correct radius when the cradle is moving back and forth. Before start, this needs to be set into "no angle position" and secured with 2 locking. Next is to place an aluminium bar on the back of the cradle, using the engineers square, the aluminium bar needs to be set to be 90° and aluminium bar then is locked in place using allen key and locking nut. Next is to place the guitar body on top of the jig and either using bridge and saddle between body and aluminium bar or measuring everything before, to find the desired angle, the pivoting cradle will then align and needs to be secured again with 2 locking nuts. Then you place templates which also slide back and forth to set the depth of the joint. There are 2 more locking nuts not shown in the photos and these are used to lock the neck in place.
The other part of the jig is obviously used to route the body and it has dovetail and M&T built in, it's simply placed on the guitar body, the depth is set and the thumbwheel nut gets tightened.
The guitar body would have to be clamped as the jig sits on the body.
The jig will come capable of doing both dovetail and M&T, meaning both templates are included with the jig.


